About Me

My photo
I've been into dollhouse miniatures since the early 1990's now and when I realized how much I've learned during that time, I thought I'd make a blog to share my knowledge with others. I'm mostly auto-deduct, but always found help on the Internet and in specific books. The mini-world starts and ends with your own imagination, so let there be no limit. And never say : I CAN'T .... because you can, you just need to try and have the necessary know-how. And that's the main reason why I started this blog, because I wanna share what I know with newbies in the miniature world or anybody else who might be interested in sharing what I've learned so far. So, hopefully, I'll be able to provide some useful hints, tips and tricks for those of you out there just starting with this wonderful hobby

Search This Blog

Blog Archive

March 8, 2012

A SMALL GARDEN

This is another good example why you should never ever throw anything away : this small garden has been made with leftover pieces from previous projects and look what came out !! This was made as a gift to a little girl (she must have been 9 years old at that time), who is the daughter of a work colleague of mine.

If you have any questions about anything you see in this pic, please don't hesitate to drop me a line and ask. That's why I'm here :-)

March 7, 2012

THE WINE CELLAR

I am getting most of my ideas for making miniatures out of our everyday life. My hubby always wanted his own wine cellar (which het got by the way when we move into our actual house 6 years ago). So before he got the real thing, I wanted to make one for him in miniature, so that it will make it easier for him to wait before he could finally get one for real.

Except for the two chairs and the bottles, everything you see here has been made out of scratch. I have a huge box with all the leftover pieces from older projects and I never ever throw anything away ..... look at this picture and you'll know why  ;-)))

THE SUMMER RETREAT


This is a kit I once discovered while browsing through the website of the Dollshouse Emporium (based in the UK)

I decided to make it a nice little summer retreat, somewhere on a beach, for my NYC family who definitely needs that after spending the rest of their time in crazy New York :-)))


And this is what it looks like today ..... so if you're interested in what happened between this 2 pictures, click on link above, it will redirect you to my HP where I added lots of pictures

Here on my blog, in the very near future, I will post more details about the kitchen inside, since it's entirely a DIY kitchen :-)

So keep coming back ... thanks

THE MUSIC ROOM

My husband is a hobby musician (he sings really good, plays the guitar and the piano, I think he should do something more with it, like becoming a professional, because he's definitely good enough)

And I made a little music room for him. By clicking on the link above, you'll see the "old" version of it, which I had made some years ago with much less experience

As you see, you really will improve if you keep going, so don't give up when something does not turn out the way you wanted it to.

DIY TABLE

Try to have a little stock of newel posts, spindles and other balusters, in different sizes and thickness, because they are ideal to make nice table legs, like in this picture f.ex.

Even if you make the rest of the table with just scratch, it looks a lot nicer when you use these posts as legs. You only need to paint them. Most good online stores specializing in miniature dollhouse items have them in stock (look under stairs, railings, posts, etc.)

March 5, 2012

FILLING THE FRIDGE

YES .... THE FRIDGE. It just can't be empty. I mean, my fridge isn't empty either, so how could I let my dollhouse people live in a house with an empty fridge ? No way ..... I love to make all these tiny little things to fill my fridge. Food is mostly made with polymer clay, other items are prints, again other are bought ready to be used.

CROCHETING

I have never been any good at knitting, but I always like the crochet. So why not try to make in just a little smaller and use it in my dollhouse.

This little blanket was made with lots of tiny little pieces about 1,5 cm big and at the end, I put them all together. It was a nice little addition to my living room (see next pic)


And here it is, my little blanket, ready to be used on cold winter evenings, sitting next to the fireplace. Cozy !!

A HOUSE IN BOXES


Here are a few pictures to warn those among you who never unpacked a really big dollhouse ..... this one here is the Grosvenor Hall with basement. I mean, you really get nuts here; first there were 6 different boxes, heavy big boxes. I couldn't even lift them .... my husband had to get them down the stairs for me. then you start with number 1 and before you get to the last box, hours have gone by and you don't know anymore where to put all the pieces. Although I'm lucky to have a great workplace, I definitely didn't know where to put everything ..... at least, once you have unpacked everything, you start to get an idea of how long it's going to take you approximately until such a big house will be finished.

But such a house should be every miniaturists dream, don't you think ?

March 4, 2012

MINI CHINA

Another thing I'm really crazy about is my mini china to fill the shelves, especially in my kitchen. Every time I'm visiting my favorite online shops, it's really hard not to buy some coffee cups, plates, tea sets, etc. They make me crazy, I admit it, it's just so cute when you hold them in your hand and they are sooooo tiny

CURTAINS AND BLINDS

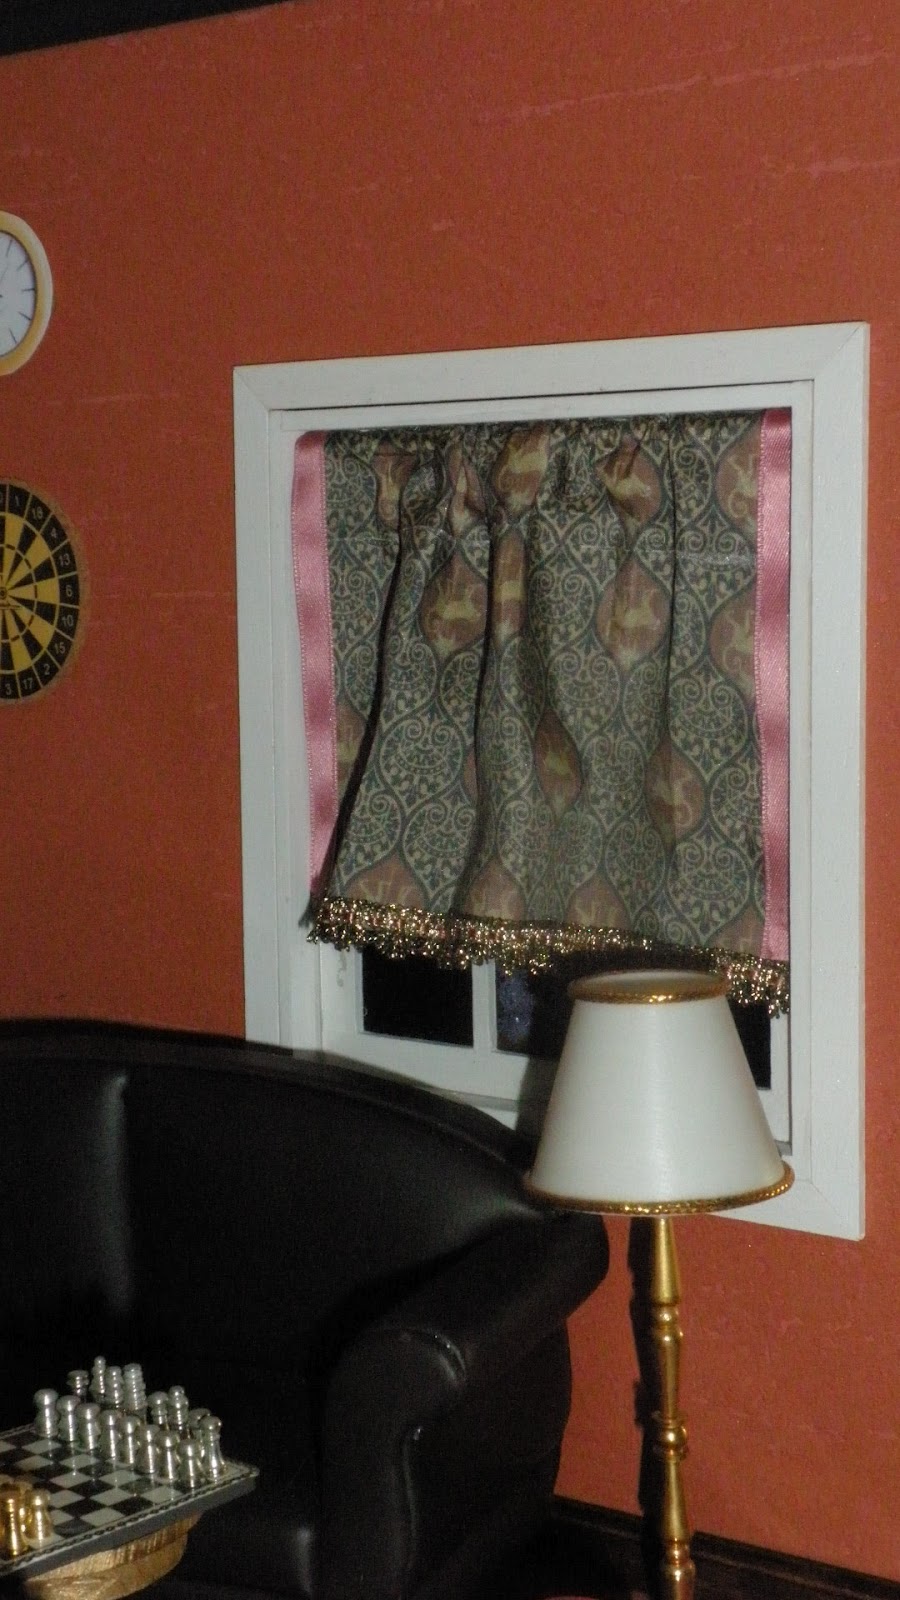
As you can see in these pics, there are endless possibilities for making curtains or blinds for your windows. When you start a huge project like the Grosvenor Hall, believe me, you will think about how much you can make on your own instead of buying everything, which will be really expensive. 

And there is a lot of help out there, books, the Internet of course, youtube, dollhouse.tv, magazines, etc. you just need to take your time to look around and have a little stock of different fabrics and lace etc. 
Believe it or not, these blinds were made with leftover wallpaper pieces, adding some braid around and glued together. 
These were made with a special pleater http://www.danneruff.com/pleater.htm
available in some good online shops.

It's a very very good technique to make curtains, they look soooo realistic. There is a little movie about how to use the pleater at www.dollhouse.tv, but remember, you need a subscription to watch these videos, but they are worth it.


If you have any questions about how I made all these curtains, please don't hesitate to contact me, I'll be glad to help. 
 As you can see here, there are lots of different versions to make curtains. Depending on the fabric you use, they might sometimes be a little stiff, so think about that when you choose your fabric
 

MARBLE EFFECT

I wanted to show you the pillars I added to my kitchen in the Grosvenor Hall. I bought these unpainted and I wanted them to look like marble. So I first painted them in white (you may of course use another color of your choice) and then started to fiddle around trying to get that marble effect. But I did not like the result at all !! So again, I added more white paint and checked on my favorite help site www.miniatures.about.com about how to achieve that marble look.

I found what I needed, but ..... in the meantime, I went to a hobby store to buy something we needed around the house and as usual, I stopped at the color spray department. AND GUESS WHAT I FOUND, hehe

In fact, it's a spray called "marbling effect spray" and it's just great. But nevertheless I would recommend to practice a little bit before applying it to the final object, because you may quickly overdo it and then you'll have to start all over again. So keep practicing. The spray is available at most hobby stores.

MINI MAGAZINES AND HOLDER

After I had finished my scrapbook shop, I became like a little expert for making my own miniature magazines in 1:12 scale

The magazine holders are from a printable website and in order to give them a more personalized look, I cut them out on pieces of left-over wallpaper instead of using simple plain cardboard.

Cute !

EMBELLISH YOUR WALLS WITH PAINTINGS

The source for these "paintings" on my dollhouse walls is
www.allposters.de

Again, these need to be copies and pasted to your computer, resized and printed (preferably on glossy photo paper or matt if you prefer) and then cut out. I would recommend in any case not to use simple copy paper. Would be a mess once it comes in contact with glue :) believe me, I know what I'm taking about
 Frames : well, you can buy them of course in any dollhouse shop (online or store). In that case you need to resize your "painting" so that it'll fit in the frame of course
Or you may wanna use another, very simple technique, for more modern paintings like this one.

Simple use a piece of balsa (or any other thin piece of wood). I wood recommend about 3to4 mm thick and paint the borders only, because the back will be glued to your wall, so nobody will ever see that it's not painted and your picture will be glued to the front.

Try to work as accurately as possible, otherwise it won't look very good.
Here's an example where I used frames that I bought in a dollhouse shop.
For a modern house, these beautiful black/white pictures of old (or new) movie stars are perfect. When you print those on glossy photo paper, they look just great. All you need to to is glue them on a black cardboard, slightly larger than your picture and you're done.

DIY : Weaving Baskets

Hello my mini friends

As you all probably know, there are different techniques to make miniature baskets
The one's we'll talk about in this post are made with the so-called weaving technique

I admit, it isn't all that easy in the beginning and the first few one's may end up in the trash. 
But you need to keep trying and help is available, either in books about miniature wicker furniture (DIY techniques) or another very good and helpful sorts is www.miniatures.about.com where Lesley Shepherd gives tons of good advice for anything you might wanna do in miniature. Just type in the search criteria on the upper right corner of the screen and I'm sure you will find help there (my personal favorite site by the way when it comes to tips and tricks)

NB : there are several materials you may wanna try when it comes to weaving baskets, the result will look slightly different depending on which one you're gonna go with


The yellow one was my first try .... gotta admit there's still a long way to go

The brown one on the left look a bit better already


Here's a bigger one I made a few months later, afin practicing a lot


And here's one made of string, a technique Carole Elbling explains in a video tutorial on dollshouse, but remember ... you need a subscription to watch these movies. So if you're interested in this fairly easy technique, drop me a line and I'll help :)

email me at DMZMINIATURES@gmail.com

See ya
πŸ‘€πŸ‘€πŸ‘€

A suitcase

You start with a block of balsa wood and end up with a cute little suitcase

Next update I'll be adding the measurements