About Me

My photo
I've been into dollhouse miniatures since the early 1990's now and when I realized how much I've learned during that time, I thought I'd make a blog to share my knowledge with others. I'm mostly auto-deduct, but always found help on the Internet and in specific books. The mini-world starts and ends with your own imagination, so let there be no limit. And never say : I CAN'T .... because you can, you just need to try and have the necessary know-how. And that's the main reason why I started this blog, because I wanna share what I know with newbies in the miniature world or anybody else who might be interested in sharing what I've learned so far. So, hopefully, I'll be able to provide some useful hints, tips and tricks for those of you out there just starting with this wonderful hobby

Search This Blog

Blog Archive

April 11, 2015

DORFPUPPENHAUS ... D.I.Y. ITEMS

Hi my friends

I always babble so much about my DIY items, so today, this post is about showing you how and where all these things ended up


In this pic you can see many many things I've either made or just pimped up a little bit
I made the 2 paintings on the left wall (didn't actually paint them, lol, just using my own technique for paintings to add to the walls) I made the mirror above the bed, painted and filled the chest, pimped up the bed and made the desk on the right out of scratch, as well as the luggage case in the back on the right


Here's one of the side tables I made, added a few dried flowers in a vase, candles I made with beads and a little pot or whatever you wanna call, could be anything really :-)


A nicely set table


Another painting and a pimped up dresser


My canisters, DIY boarders, painting etc


The famous paper plates, lol


A few of the dining room


Bowl and Kitchen Canisters


A little basket for the wine bottles


A closer look at the paintings .... and the DIY bedding


A dresser made entirely out of scratch


The chest filled with all sorts of DIY items


The little room in the attic with the child's bed and toys from when she was very very little
She's a grow-up now and does no longer live with her parents


I changed the fireplace later, this one just didn't look ok to me
I also made the little basket for the fire wood


Candles .... made with beads, some air-dry clay and a little wire


Another little pot that might contain anything you want or could just be used as a decoration object


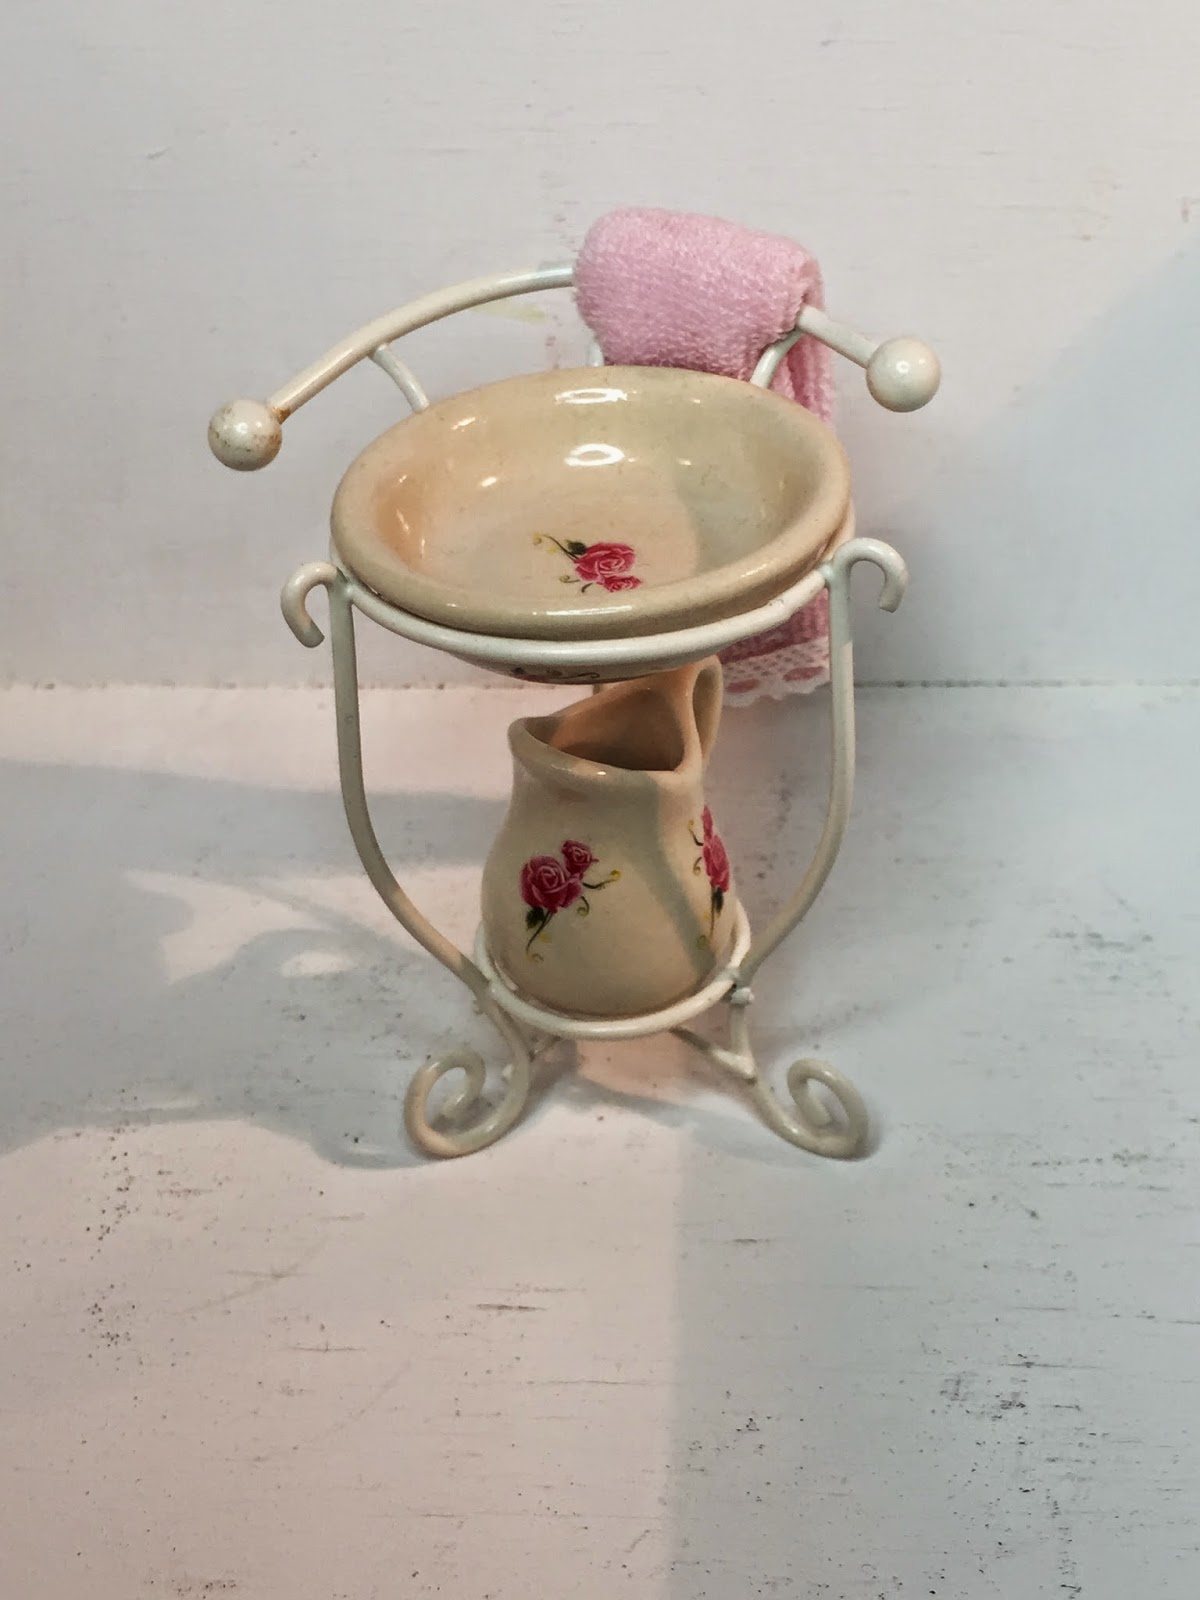
The pimped bathroom furniture


Since I made so many of these vanity/soap/shampoo bottles, I added some to my little bathroom here


And a few more from the blue series, as well as another painting

As you can see from this post, it's worth trying your hand at making all sorts of things for your dollhouse yourself, it's really rewarding and you can also be proud of yourself

See ya soon
πŸ‘€πŸ‘€πŸ‘€

DORFPUPPENHAUS ... PIMP UP THE FURNITURE


Hello

I must say I don't like that plain brownish wooden furniture very much, even though it goes well with that kind of dollhouse. This "Dorfpuppenhaus", as the name says, is kind of a village house or a farm house and of course, you wouldn't use modern furniture, would you ?

Most of the furniture you see in the pics below are simple brown wooden pieces, which I kind of "pimped up" with a few very simple techniques, I just like it a little more colored, can't help it

πŸ‘»πŸ‘»πŸ‘»

You can simply add dots or flower decals (both need to be varnished in order to hold), you can add pieces of flowered paper (either self printed or from dollhouse wallpaper left-overs), add some lace for a more shabby look.

Of course, there's always the option to entirely sand and re-paint a piece of furniture. Add some DIY miniature accessories and you'll see what a difference it will make to your entire room


For these chairs, I simply added a few flower decals and some dots with acrylic paint 
and varnish to finish


Same for the table, with a little bit of additional lace


the Rocking Chair


Here I used some colored paper with a nice flower pattern (which I usually find somewhere around the Internet, transfer it to my computer and print it out)


Same technique here .... once I glued on the paper on top, I added the sink and a few of my other DIY items and now this bathroom table looks just the way I wanted

ME BE HAAAPPPPYYYY 
πŸ‘― πŸ‘― πŸ‘― πŸ‘― πŸ‘― 


For the cradle, I used these self-adhesive relief stickers, but in order to get the motive thick enough, you'll need to glue at least 3 on top of each other.

Another way to get a nice touch is to glue these stickers first and paint afterwards, give's a good end result too. Once the paint is dry, you can always go over the motive with a different color if you like, that's entirely up to you and your imagination


Here I used leftovers from some wallpaper 


I'm sure you all have some fabric leftovers around (should be with a very tiny pattern of course if you want to use it for your miniature projects .... or simply buy the fabric in a dollhouse shop, that way, you'll make sure the size of the pattern is correct) ....
anyway, such a cute little bedding is quickly made and there's no sewing needed, I'm always using special fabric glue

It is a shame that I can't sew, neither by hand, nor with a sewing machine, because my Daddy was a tailor and he always tried to get me to it, but it just isn't my thing


Here, I simply added a few roses (decals) to add a more shabby touch


These miniature chest can be found anywhere, either dollhouse shops, hobby and craft stores, even Amazon (there's nothing you can't find on Amazon anyway, haha)

So I painted mine red with a black top (I just love to use colors) and filled it ... ready to find it's place in the bedroom


A cozy kitchen .... I don't just change the furniture here, but I also use my own wallpapers, borders, flooring, railings etc. ... just love to add my very personal touches to all my miniature projects


Both this chair and the barrel did not come with the furniture for this house (remember ... it's  house that's being assembled over a time period of 2 years, it comes with a magazine, 4 issues a month)
but I painted both items and added them to my kitchen


Here are the canisters I made and one of my bowls

It's always a must to add my own DIY items to every dollhouse
As you can see, with just a few little tricks, you can easily sort of pimp up your dollhouse furniture

Have fun and stay tuned
there's more to come

See ya 
πŸ‘€πŸ‘€πŸ‘€


DORFPUPPENHAUS ... SMALL SIDE TABLES

Hi everybody,

As you must have guessed by now, I do not only spend a lot of time on making my miniatures, but I do also spend a lot of time on the Internet. I mean, you can't deny it, is is THE BEST SOURCE these days if you search for tutorials, DIY tips etc.

I found a tutorial on Youtube once where these little round wooden parts were used .... for something completely different, but nevertheless, I came up with the idea of using them for making these little side tables.

You really don't need much more to make these simple tables, which you can use in all sorts of miniature projects in 1:12th scale

For the top of the ones you see in the picture below, I used these wooden discs - available f.ex. at amazon.com (I inserted a link below at the end of this post)

For the lower part of the one on the left (in light yellow), I was lucky that I had a box of old unused chess pieces. These are perfect and very useful in making all sorts of DIY minis, just cut of the top and let your imagination go wild :-)

For the second one on the right (in pink), I used spindles, always have a little stock of those. They are available in small packages of either 2, 4, 6 or more at most dollshouse shops. Depending on the hight of your table, you might wanna cut off a small part, depending in the final use of your table.

Once the parts are all glued, start painting. I used some lace to go around the table top and water decals on the yellow one. Decorate and you're done. Real easy project, very suitable for beginners too

TIP : when I glue wood pieces together, I do always use special wood glue, I've come to realize that it usually holds better and longer. My personal favorite is Titebond, but you can of course use tacky glue or any other brand, that's entirely up to you.

Have fun trying out this project

See ya soon
πŸ‘€πŸ‘€πŸ‘€


DORFPUPPENHAUS ... PAPER PLATES


Hi my miniature friends

Today I wanted to talk a little bit about PAPER PLATES
In the past, I have already tried out FIMO (Polymer clay) to make china for my dollhouses and although it took a while and a lot of practice until everything looked the way I wanted it to, it was worth it. but since I'm a sworn DIYer I always look around for new ways and I read an article once about making paper plates

OK first I said : what ? plates made with paper ? that can't possibly work 😳😳😳
And then I found this paper plate maker on Etsy and with a little patience and a lot of fiddling around, I managed to make plates and  I must say, they don't look bad at all

First I printed all sorts of designs on a piece of light cardboard (this of course only if you're printer is OK with it) but you can also or matt photo paper, which is the option I used for these

I do NOT print out these round shapes directly, I simply print the design on a DIN A4 page (or just half of it, depending on how many plates you wanna make). I bought the miniature paper plate maker and a few round puches in different sizes and that's almost everything you'll need.

First I punched a few with the design on, and a few simple white ones (also from matt photo paper) and glued them together. If you are using one single punch, the plates are definitely gonna be too thin. If you want them to be even more "perfect", punch out a few smaller ones for the middle part of your plates (underneath) and glue one to each plate. Then ... once the glue is dry ... use the paper plate maker (link is below) and you're plates are almost done. Just need a few layers of varnish (whatever kind you have) and you're done.

have fun


So tell me what you're thinking ... are they OK, my little paper plates 
I decided to hang these on the walls in my Dorfpuppenhaus
They also add a lot of color and a lot of character to this little kitchen


This is a picture of the plate maker I purchases on Etsy


If you make your own paper plates, even with a different method, I'll be very happy to see a few pictures, so feel free to get in touch by email (dmzminiatures@gmail.com)

See ya soon
πŸ‘€πŸ‘€πŸ‘€