

Hello my friends and followers
Today I'm going to show you how to make this cute little gift basket with bath items and
of course I'll show you how to make this cute little bottles you see in there too

I hope you'll enjoy this little project as much as I did
Of course this cute basket can be used in anyway you want or need it for your own little project
So let's get started 😀😀
LIST OF MATERIALS NEEDED
PART I to make the gift basket and items to fill it
* Small cardboard or paper mache boxes
(these are available in packages of 10 or more at most craft stores or Amazon;
different shapes and sizes are available, it’s best to choose the smallest for
miniature projects in 1/12th scale)
different shapes and sizes are available, it’s best to choose the smallest for
miniature projects in 1/12th scale)
- Acrylic paint of your choice
- Paintbrush
- Dotting Tool (or very small paintbrush)
- Cardboard stripes matching your choice of paint
- Metal Ruler
- X-acto knife
- All Purpose Glue
- Water based crystal clear varnish
- Small clamps
- Ribbon
- Embellishments of your choice (flat pearls, rhinestones etc)
- Piece of Ribbon matching your choice of paint
- Pieces of an old wash- or cleaning cloth (microfiber)
- Scissors
- Water Decals or self-adhesive mini flower stickers (optional)
- Piece of real soap
- Mini Grater
- Tiny glass bottle with kork
- DIY labels of your choice
- Crystal clear tape
- Printable Soap box
PART II to make the bath bottles
- Crystal clear resin (I used the one from Gedeo)
- Disposable plastic containers
- Wooden stirrers
- Disposable rubber gloves
- Kitchen paper towels
- Soft Pastel colours
- Clear empty gelatine capsules (different sizes)
- Bird Sand
- Disposable syringe
- DIY printable labels of your choice
- Raw Brass 2-3-4-5-6 mm Pendant finding Setting (found on ETSY)
- Liquid superglue
- Tweezers
PART I : THE GIFT BASKET
STEP 1
For this project, we are gonna use only the lid of a round box with a diameter of 4 cm (1 37/64”). Use acrylic paint of your choice to paint it. You can use the same paint for the inside and outside or use 2 different ones, that’s up to you
Let the paint dry


STEP 2
Add some ribbon to the outside of your box. I used self-adhesive ribbon here, which is easy to apply, since you don’t need any glue.
Using the small end of a dotting tool (much easier than with a paintbrush :-), add some paint to the upper border of your basket to give it a neater finish
TIP : If you are using normal ribbon, it’s best to use no-sew glue

STEP 3
Cut a strip of cardboard of your choice (for the handle) about 9 cm long and 3 mm wide (3 35/64” x 1/8”) This can be shorter of course, depending on how big you want your handle to be. Apply some clear varnish to the strip of cardboard
(in case you wonder, the varnish gives it a nicer finish and makes it look a bit like leather)
(in case you wonder, the varnish gives it a nicer finish and makes it look a bit like leather)


Once the varnish has dried, glue the handle to the basket and hold it with clamps until the glue has set

Embellish your basket by adding a small bow to the top of the handle and some pearls (flat on one side) to the sides

STEP 4
Cut a piece from an old wash- or cleaning cloth (best to use microfiber) about 8 cm long and 2 cm wide
(3 5/32” x 25/32”). This is gonna be a towel. Roll it up and add some glue to one end like shown in photo below. Hold until the glue has set


Cut a strip of cardboard about 5 cm long and 5 mm wide (2” x 13/64”) and add some varnish to it. Let dry and glue around your towel. Feel free to add some details to it using self adhesive flowers or maybe some tiny water decals)


STEP 5
Grate some soap with the small grater. This is going to be the bath salt. Fill it into a small glass bottle, preferably with a cork. Add some decorative ribbon to your bottle


Search for labels on the Internet, copy/paste them to your computer, downsize them and print on regular paper. For such a small bottle like the one used in this project (2 cm high - 25/32”), you will need a label that fits it, so keep this in mind when adjusting your size before printing.

Before cutting your labels out, cover them with crystal clear tape. This gives them a better hold, a nice shiny look and prevents the glue from coming through. I tried this with clear crystal varnish, but regular paper doesn't really like to get "wet" 😏😏
Cut out your label, roll it over the end of a paintbrush and glue it to your bottle


We now have 2 cute little items to fill our gift basket.

PART II : THE BATH BOTTLES
Before starting, I’d like to say that I did not invent this method myself, I found it on the Internet, but unfortunately the link seems to no longer exist
www.lisaslittlethings.com/tutorials
STEP 6
When working with resin, you should be careful, always protect your eyes and hands and your work table. If possible open the window so that your room is well ventilated. The little measuring cups should be included in the package
Cover your work table with kitchen paper towels, put on your gloves and have a disposable plastic cup and a wooden stirrer ready. Also rip of a few paper towels to have them at hand when needed
Following the instructions on your package, pour 40 ml of Resin 1 into one of the measuring cups and 20 ml of Hardener B into the second. Make sure to close your bottles as soon as your done and put them aside. Pour both liquids into your disposable plastic container. The resin A is not as liquid as the hardener, you need to use your wooden stirrer to get it all out. Take a paper towels and clean both of the measuring cups right away and put them aside

Now start stirring for a few minutes. Take soft pastel colours, using 2 different pink shades. Using your x-acto knife, rub off some of the pastel colour right into your resin.
Don’t add too much colour at once. Keep stirring until you’re satisfied with the colour and until you don’t see anymore bits of pastel colour. This colour is for “rose” scented bath products, feel free to use any other colour of your choice for your own project.


STEP 7
In order to fill the gelatine capsules, they’ll need to be standing upside down. The photo below shows one of the boards my husband made for me, using 1 cm MDF wood. He drilled holes in different sizes into the wood, making sure not to go all the way through of course. These boards are great when making lots of bottles at a time)

But no worries, we do have another option :-)
Open all your gelatine capsules. Take some bird sand and pour it into a plastic cup (I’m always keeping my empty yoghurt containers). Using your tweezers, push all your capsules (use different sizes) slowly into the sand, upside down of course, making sure no sand gets to the inside


Fill a syringe (without the needle !!!) with your mixed resin, being very careful so that your cup won’t fall over. Wipe the excess resin off the top of your syringe using a paper towel

Now start filling your gel capsules very very slowly, drop by drop, until they are all filled up entirely. You really need a steady hand for this step. Should you spill the resin, use your tweezers and remove the capsule right away and replace it with an empty one. You’ll have enough time to do this, resin does not harden that quickly. So no rush !


LET DRY OVERNIGHT !!!!!
YOU CAN PRINT OUT YOUR LABELS NOW SO YOU’LL HAVE THEM READY TO FINISH UP YOUR BOTTLE
STEP 8.1
STEP 8.1
Take your finished bottles out of the sand. Choose the labels you want to use for your project and cover them with clear crystal tape. Cut out as many as you’ll need.
TIP : Before gluing your labels to the bottles, bend them over the end of a paintbrush
This job might be a bit fiddly, due to the size of the labels, so I suggest to use your tweezers to hold the label and a toothpick to apply the glue.


Your bottles should now look like the ones shown in the photo below

I’m using “Raw Brass 2-3-4-5-6 mm Pendant finding Setting” for my bottle caps, but feel free to use beads or any other suitable jewellery findings you have
(found on ETSY --> link to the shop https://www.etsy.com/shop/OzBrassShop?ref=l2-shopheader-name)
I added a few photos at the end of this tutorial to show the different items I used to make the bottle caps.

To glue on the caps, I find it easier to pour a few drops of liquid superglue on a metal surface and using the tweezers, dip each cap into the glue and then onto the top of the bottle. I tried otherwise (applying the glue either directly to the bottle or the cap) but I ended up with more glue on my hands than anywhere else. Just be careful not to dip your tweezers into the glue 🙀🙀🙀

You should now have a few cute bath bottles as shown in photo below

To fill my little gift basket, I made another towel, neatly folded and a soap box (miniature printable boxes can easily be found on the Internet)

I hope you had fun making this project. Go crazy making your own bottles :-)
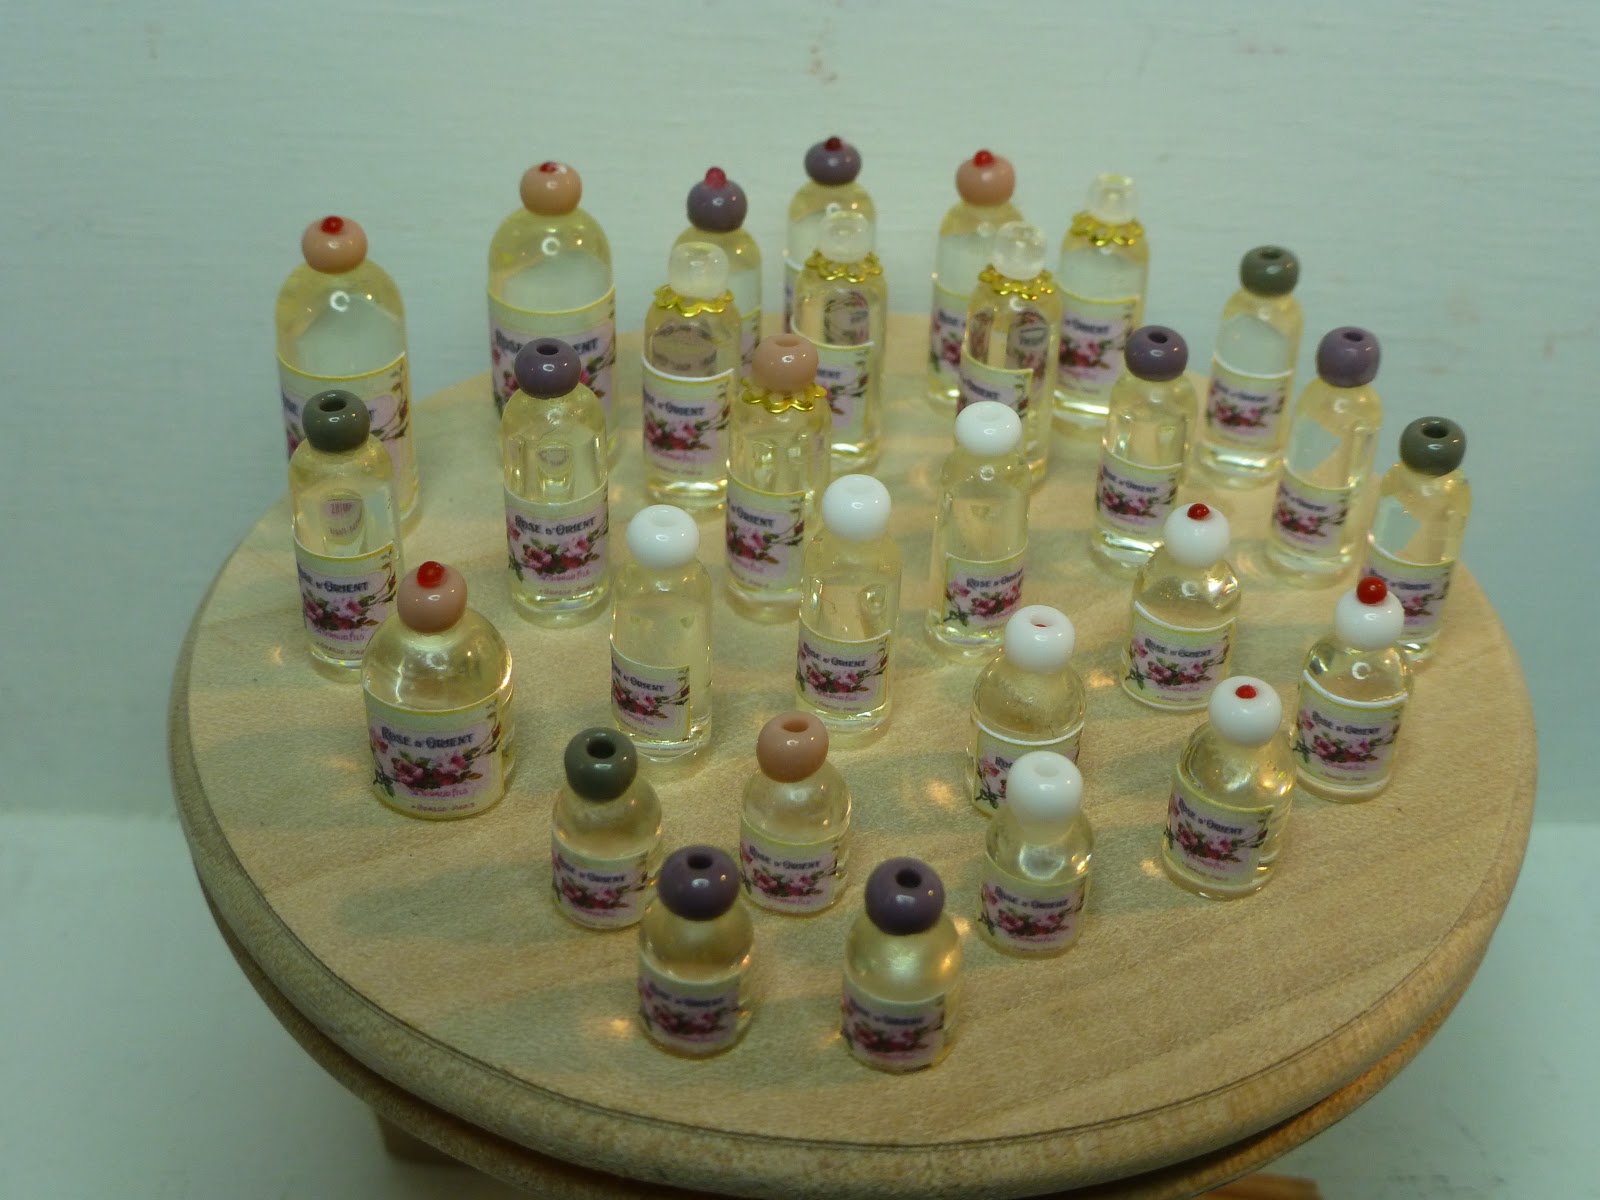
Just so you'll see that the brass bead caps I used are not necessary, here are a few pics of other bottles I made using simple beads as bottle caps


Just so you'll see that the brass bead caps I used are not necessary, here are a few pics of other bottles I made using simple beads as bottle caps


Let me know if you enjoyed this tutorial and feel free to send me some photos of your own project
(dmzminiatures@gmail.com)
Needles to say that I'm always open to suggestions, since I'm not a professional in making minis
See ya
👀👀👀
D.
Preciosa cesta y genial el tutorial!! Muchas gracias!
ReplyDeleteBesos.